This post presents a Software Application which provides the functionality of Capturing Screenshots Automatically. Further this post displays how you can schedule Capture of Screenshots and finally this post displays how to view the Screenshots captured. The Software Application presented here can be used on Windows XP, Windows Vista, Windows 7, Windows 8 and even on Windows 8.1 Computers. The Screenshots displayed in this tutorial have been captured on Windows 7, so if you are using another Windows Operating System, the Task Scheduler Screens might look different on your Operating System.
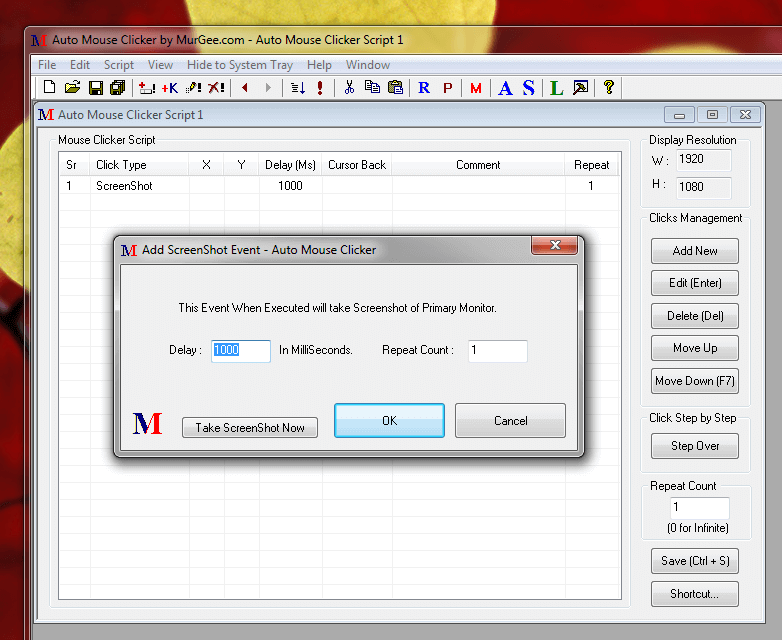
Auto Screenshot Software
The above Screenshot displays how you can Capture Screenshots Automatically. The Software displayed above basically allows you to add Screenshot Action and then when you execute the Script, the Screenshot will be captured and stored in a specific folder as .png file. Here you can specify how many screenshots you wish to capture and at what duration interval, you want the screenshots to be captured when the script is executed.
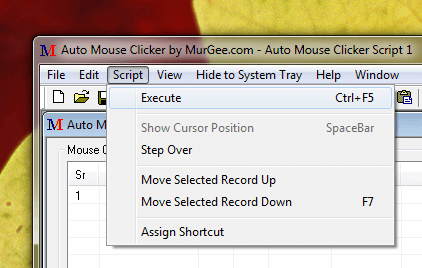
Start Automatic Screenshot Capture
There are multiple methods in which you can start Auto Screenshot Capture. One of the method is displayed in the screenshot above. In Order to execute the Screenshot Script, press Keyboard Shortcut Ctrl + F5 when the Script is in Focus or press select the Script Menu and then select the Execute option to capture Screenshot.
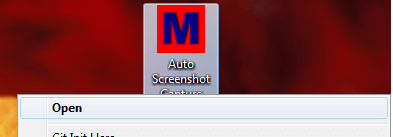
Auto Screenshot Capture with Desktop Shortcut
Another way in which you can take screenshot is to save the Screenshot Script as a .mcs file and then either Double Click on that file or Right Click on the File and Click on the Open Menu option. Once you have saved the script to a file, you can open that .mcs file anytime you want and let the Software capture Screenshots Automatically as configured in the Script.
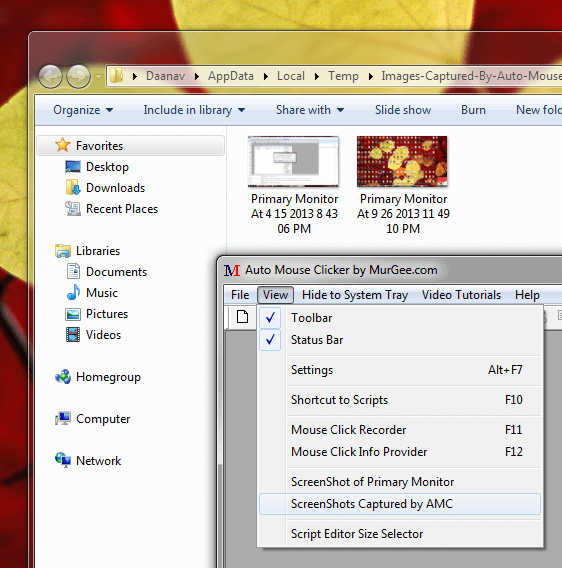
View Screenshots Stored by Auto Screenshot Script
In order to view the Screenshots captured, Open the Software and Click on the Menu Option Screenshots Captured by AMC from the View Menu as displayed in the Screenshot above. Note that the Screenshots have been saved by the software with file name created with Screenshot Date and Time. You can also assign a Keyboard Shortcut to execute the Auto Screenshot Script as displayed in the Screenshot below.
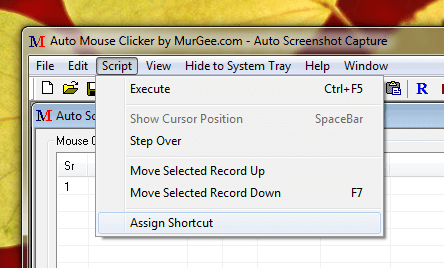
Capture Screenshots with Keyboard Shortcut
Assigning a Keyboard Shortcut will let you Capture Screenshots Automatically as and when you want. The Number of Screenshots to capture and time delay between the Screenshots is stored in the Script and hence all you need to capture Screenshots is just Execute the Script Macro with any of the methods outlined above.
In case you want to capture Screenshots Automatically at a later date / time, you can use Windows Task Scheduler to Capture Screenshots Automatically. Rest of this post describes how you can configure Task Scheduler to Auto Capture Screenshots with the Screenshot Script file created above using Auto Mouse Clicker Application for Windows.
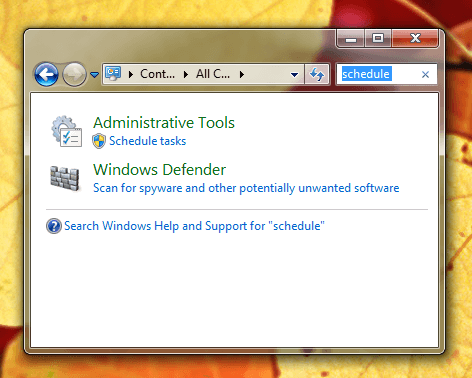
Schedule Auto Screenshot Capture
In order to Locate and Open Windows Task Scheduler, open Control Panel and search for the word schedule and click on the Schedule tasks link as shown in the screenshot above. In order to Schedule Automatic Screenshot Capture, create a basic Task and schedule it and that’s it. Whenever you want to view the Screenshots Captured, you can always view the Screenshots captured using the View Screenshots option as described earlier in this post.
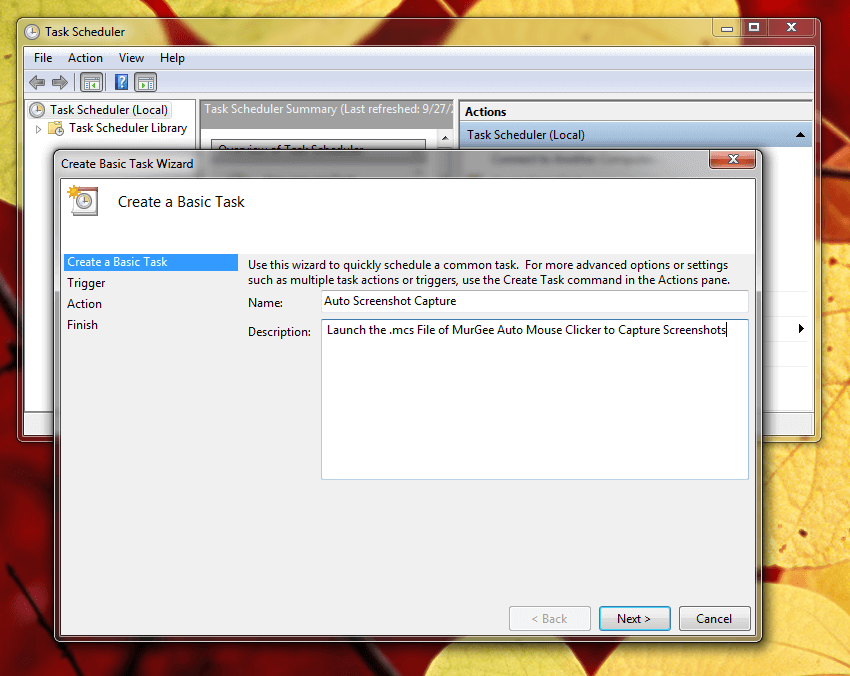
Create Basic Task with Task Scheduler to Capture Screenshots Automatically
The above Screenshot displays Task Scheduler being used to create a Basic Task. Enter an Appropriate Name and Description for the task and click on Next to proceed ahead and create a Windows Scheduler Task to capture Screenshots Automatically at later Date Time on a Recurring basis or only at Specific Date / Time.
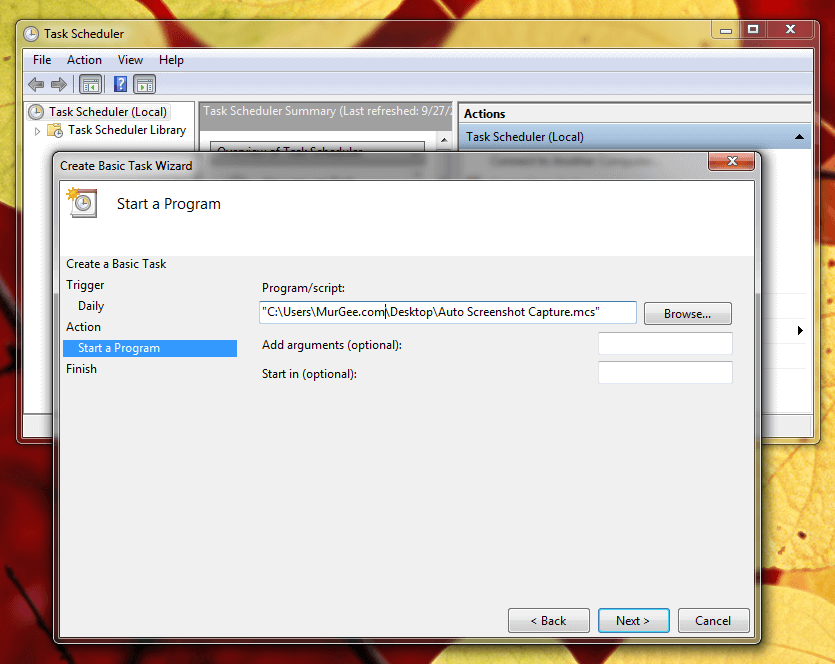
Specify Path of Auto Screenshot Capture Script in Task Scheduler
The above screenshot displays an important aspect of this whole process of creating a Task to Auto Capture Screenshot of a Windows Computer. Note that the Action Selected to create this Auto Screenshot Task is Start a Program and the Program/script field has been filled with file path of the Auto Screenshot Script File with .mcs file extension. Once you have specified the file path of the .mcs file in Task Scheduler, just complete the process of creating the Task and the Script will capture Screenshots of your Windows Computer and will store at predefined location automatically.