In order to take a Full Screen or Partial Screenshot on Windows 7, you can use the Snipping Tool. Yes Prt Scr button does works on Windows 7, however the Snipping Tool in Windows 7 offers much more functionality saving you from the efforts of multiple steps to capture and store a Screenshot. This post describes how you can Locate and Launch the Snipping Tool and capture Snips (Screenshots are called as Snips in the Snipping Tool) in various ways.
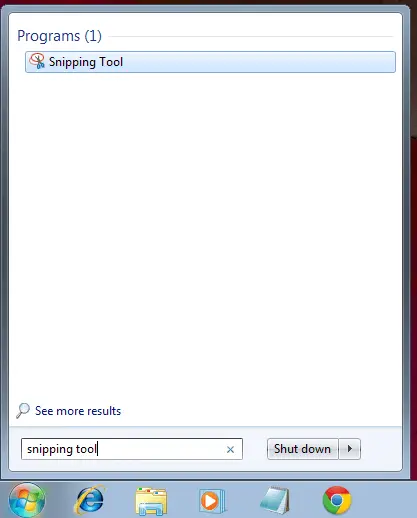
Locate and Launch Snipping Tool to Capture Screenshot in Windows 7
Launch Snipping Tool from Start Menu as displayed in the screenshot above. Once you have located the Snipping Tool, launch it and you are ready to capture screenshot in much more advanced way. As Snipping Tool is from Microsoft, you can expect flawless performance and all the advanced features you would need from a Screenshot tool.
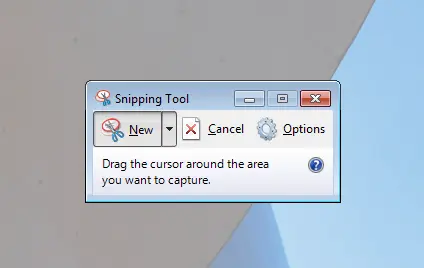
Capture Screenshot with Snipping Tool in Windows 7
This Screenshot Tool from Microsoft gets ready to capture Screenshot at startup and by default allows you to select the area of the screen which you wish to capture as image. When the Snipping Tool is running in default mode, you will notice that your screens dims a little with white transparent window and you can select the area of the screen which you wish to capture using the mouse cursor. Click on the top left position of your desired screen area and then keep holding mouse cursor while you move your hand and hence mouse cursor to the bottom end to capture screenshot (or Snip as is called by the Snipping Tool) and release Mouse cursor.
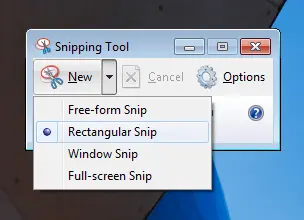
Capture Full or Partial Screenshot on Windows 7
The above screenshot displays available options to capture screenshot with Microsoft Snipping Tool. This Screenshot tool does provide advanced configurable options as is evident from the screenshot above and yes in built help is available as well. The Free-form Snip feature of this Screenshot Software allows you to select an area of the screen using your Mouse cursor and only the selected area is captured to the Clipboard and can be saved as a file. Other ways to capture Screenshot is either select a rectangular area of the screen or select an active Window to capture it’s screenshot or simply get a Screenshot of Complete Visible area of your Display Device(s).
Window Screenshot Captured with Windows 7 Snipping Tool
The above Screenshot was captured with this Snipping Tool using the Window Snip option and saved as a .png File. The Image quality produced by Window Snip option is the same as produced using the Alt + Print Screen Keyboard Keys to capture Screenshot of a Window. This Screenshot Tool allows you to save the captured Screenshots to PNG, GIF, JPEG and MHT file. Basic Image Editing is also supported in this Snip Tool which should be sufficient for basic purposes.
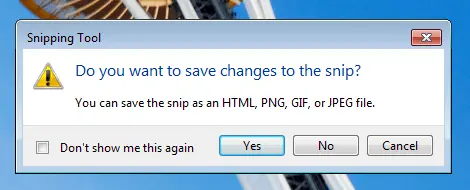
Save Screenshot as HTML, PNG, GIF or JPEG File
By default the Screenshot captured with this Snip Tool is copied to Clipboard as well. You can always replace the image in clipboard using any of the methods including Prt Scr Key on Keyboard, Alt + Prt Scr Button on Keyboard or simply create a new snip and confirm the image in clipboard by pasting it in any available Image Editor or Word Document. Yes this Screenshot Tool can be really time saver.